Counterstrike - C1
Lost Planet 2 Walkthrough and Guide
Counterstrike
Chapter 1
 |
Mission 1
Objective: Break Through the Enemy Lines Quickly!
Gold -- Complete the level in seven minutes or less to earn this GJ award.
Players one and three spawn downstairs with nothing but a Handgun. Players two and four spawn upstairs with the standard Machine Gun and Hand Grenades.
Players two and four have the relatively easy task of fighting their way downstairs to assist the other half of their team. Players one and three, armed with only a Handgun, are in a much tighter spot. If you're playing with human allies and you are player one or player three, it's easiest to wait for your better-equipped teammates to come to your aid, however you can just as well clear the floor with a bit of patience.
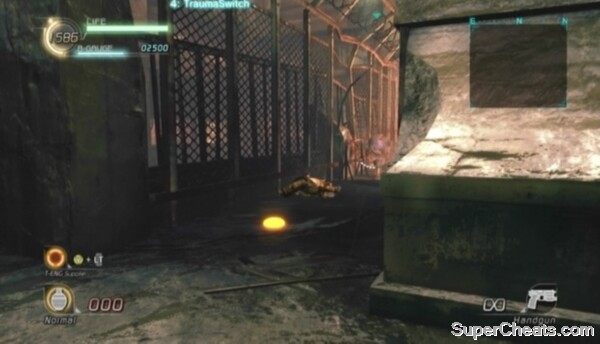
Assuming you are player one (or player three), exit the room you spawn in and turn right. There are two snipers at the other end of the corridor; they can shoot you through the window, so crouch by clicking and holding the Left Stick and move below the window. Be ready for a Shotgun-wielding soldier when you reach the corner. Shoot him in the head a few times and then continue forward.
When you reach the next corner, roll to the cover straight ahead and gun down the crouched soldier by the window. Then, peek out from behind cover and shoot the sensor partway down the corridor until it's destroyed.
 Players one and three start this level off with nothing but a Handgun. |
Once you've disabled the Sentry Turrets, you just have the two snipers to contend with. Backtrack to the start of the level and head north instead. When you reach the corner, take out the sniper on the stairs and then the other sniper near the Data Post. The other half of your team should be downstairs by now, so these snipers will likely be distracted.
Objective: Activate All the Data Posts!
All Data Posts Online -- Activate both Data Posts in the level to earn this award.
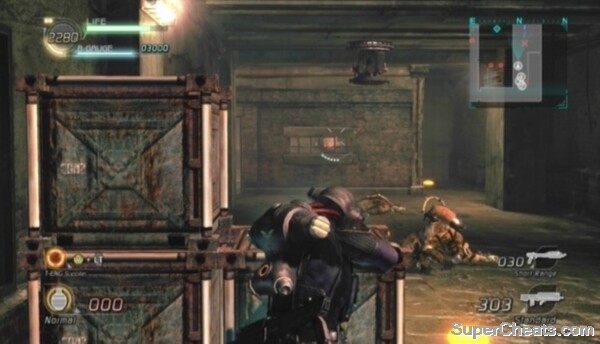
Activate Data Post 1 after killing the snipers and then head up the stairs north of the post. There is a Machine Gun and a Shotgun through the first door on your right, however there are four enemy soldiers you will have to eliminate beforehand. AI partners will likely hang by the Data Post, leaving you to kill these soldiers by yourself with nothing but a Handgun. Just duck back behind the corner if you're low on health and use your Harmonizer to recover.
Now that you have better weapons, return to the Data Post and proceed down the stairs south of it. Take cover around the corner and gun down the group of soldiers at the north end of the hall. Behind these soldiers are three Sentry Turrets hanging from the ceiling. The sensor visible through the barred window behind this line of turrets is only tied to the middle turret. Another sensor controls the other two turrets, this one behind the stack of breakable boxes to the right of the barred window. Break the boxes and destroy the sensor from the other end of the hall before moving up.
Around the corner up ahead are more soldiers and two more Sensory Turrets. The sensor tied to these turrets is visible through the adjacent window, so destroy this sensor before turning the corner to avoid being shredded.
 There are Sentry Turrets on every floor. |
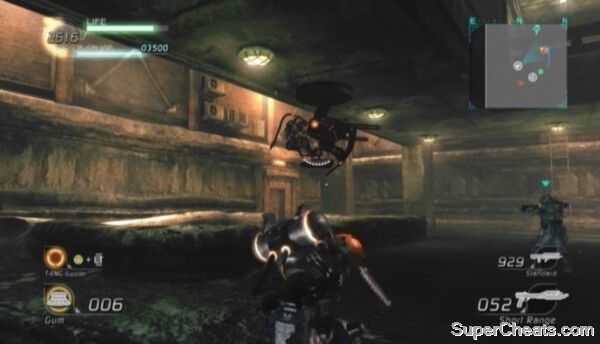
The second Data Post is at the north end of this corridor. Once the Data Post is online, enter the room through the doorway at the northwest end of the corridor and destroy the crate covering the opening in north wall of the room. Crouch through the opening to find Machine Ammo, a Rifle and some Sticky Grenades in the adjacent room. Pick up the grenades and ammo and then continue down the stairs to the left of Data Post 2.
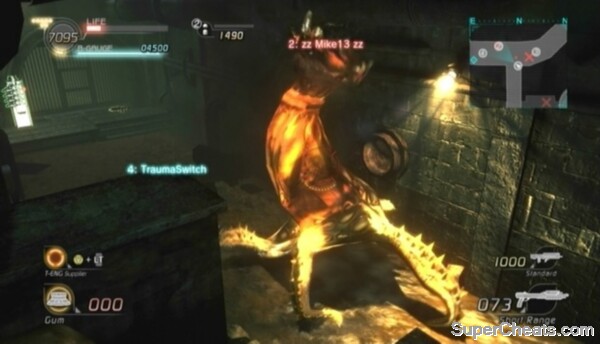
In the area down the stairs you'll face one Baylid and one Bleed VS, some enemy soldiers and a turret emplacement. Immediately make your way to the platform at the south end of the room and equip the Battle Armor and collect the Gum Grenades on the south side of the platform.
Destroy the two Baylids and the Bleed VS with your Gum Grenades and Shotgun. The Bleed VS is armed with a VS Lance, so hit it with Gum Grenades before it gets too close. If you do end up facing it up close, roll when it swings its weapon and then blast the VS with your Shotgun to stagger it.
Once the enemy VSs have been taken care of, clear the area of soldiers and then move around to the turret emplacement in the middle of the room. Hit the turret emplacement with your Shotgun at point-blank range to destroy it. With that, drop down to the door behind the turret and activate the two locks to open the door. Step past the red line to begin the 'area complete' countdown.
 Take out the enemy VSs on the bottom floor. |
Objective: Strike a Pose!
Emote: All Players -- To earn this award during the area complete countdown, all four players must be performing an Emote at the same time. To perform an Emote, hold the Start button and press one of the shoulder buttons or one of the buttons on the D-Pad.
Human teammates aren't required to earn this award, however AI partners aren't always reliable. You may need to perform an Emote a few times to trigger theirs.
Mission 2
Move through the sewers and you will soon encounter some Trilid and Genessa pods.
Objective: Akrid Extermination Challenge
Akrid Massacre -- Kill most of the Sepia, Bolsepia and Genessa in this tunnel to earn this GJ award.
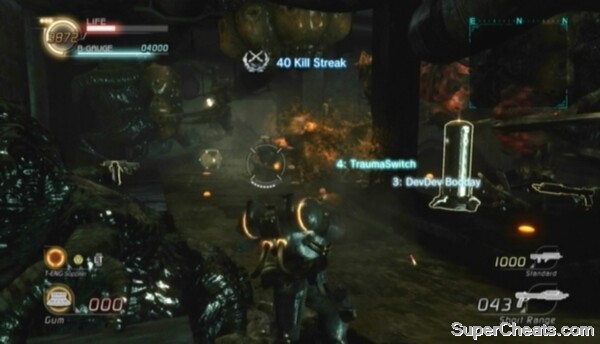
Shoot down the Trilid, burst the Genessa pods and then rather than dropping through the hole at the end of the path, turn right and walk around the ledge to the tunnel across the gap. Open the T-ENG chest in this tunnel to find a Shotgun. Pick up the Shotgun and use it (along with grenades) to kill the Sepia and Genessa pods down the adjacent tunnel. Take your time to avoid becoming overwhelmed by these akrid. There are Bolsepia (the exploding ones) at the back of the tunnel, so be careful.
 Fight your way through the akrid-infested tunnel. |
Objective: Activate All the Data Posts!
All Data Posts Online -- Activate both Data Posts in the level to earn this award.
Data Post 2 is in the middle of the akrid-infested tunnel. Activate the Data Post and equip the Battle Armor next to it if you aren't already wearing some. Continue west to the other end of the tunnel. Don't drop down just yet, as a Defolma will soon emerge from the pipe.
Objective: Exterminate the Akrid!
All Akrid Defeated -- Kill all three Defolma to earn this award.
Fire down at the first Defolma with your Shotgun to take it out. Aim for its mouth and head. Drop down to reach the end of the level once the way is clear. If you want to earn the Gold GJ award for this objective, there are still two more Defolma to defeat in the sewers. There's one more Data Post as well.
Head east down the sewers and destroy the Genessa pod that spawns on the wall. Around the corner, move up and activate Data Post 1 and then pick up the Machine Gun and Shotgun ammo next to it. Two more Genessa pods and the second Defolma should appear. Now that you're on level ground, don't stand directly in front of the Defolma, as doing so leaves you vulnerable to its devour attack.
Burst the pods, kill the Defolma and then head back to the other end of the tunnel. If you haven't defeated a third Defolma yet, you will encounter another one on your way to the lock. Kill the Defolma before activating the lock to start the 'area complete' countdown.
 Kill the three Defolma at the end of the level to earn the Gold GJ award. |
Mission 3
Objective: Penetrate the Defence Perimeter
Crouch through the opening at the end of the tunnel and drop into the water. Anchor up to the platform and gun down the two soldiers there.
There's an enemy Evax VS on this platform and one across the bridge. If you still have a Shotgun from the previous level, get close and blast the VS nearest to you at point-blank range. If you don't have a Shotgun, there are Dummy Grenades in the T-ENG chest on the platform. Use the Disc Grenades at the north end of the platform to destroy the Evax VS across the bridge.
When the VS is down, sprint across the bridge and take cover behind the stairs south of the Data Post. Pick up the Shotgun and Machine Gun ammo behind the stairs.
There is a row of plasma-firing Sentry Turrets blocking your path. The two sensors tied to these turrets are on the walkway the turrets are hanging from. Anchor onto the walkway across from the line of turrets and destroy the sensors with your Machine Gun. Zoom in by pressing up on the D-Pad if need be. You could also use the Disc Grenades in the T-ENG chest on the same walkway.
 Destroy the two sensors on the platform above the line off Sentry Turrets. |
There's a Rocket Launcher-wielding enemy by the stairs next to the Data Post and a sniper through the doorway at the top of those stairs, so be careful.
Move up and activate Data Post 1 once the line of Sentry Turrets is disabled. Move through the doorway next to the Data Post to find Dummy Grenades, Plasma Grenades, a Gatling Gun, and a Rifle. Pick up the Rifle and use it to pick off the enemies at the other end of the area. Just be sure to hold on to your Shotgun.
Objective: Fight Off Enemy VSs!
All VSs Destroyed -- Destroy all of the enemy VSs to earn this award.
Look for an overturned Nida VS along the right side of the canal. This VS is armed with a Gatling Gun and VS Rocket Launcher, which you can use to destroy the enemy Evax, Drio and Cakti VSs in this area.
The Evax and Cakti is at the north end of the area and the Drio is on the platform west of where you found the Nida. The Cakti has a Cannon attached to it, so take that one out first. Just make sure you're out of range of the Drio. If your VS is destroyed, there is a vacant Evax armed with a Cannon south of the enemy Cakti and a human Rocket Launcher in the corner of the platform where you found the Nida VS.
 Use the Nida to damage the enemy VSs. |
No comments yet. Tell us what you think to be the first.